Archlinux及KDE桌面安装与配置
1. 确认是否为efi启动方式
1
| ls /sys/firmware/efi/efivars
|
2. 分区和格式化
- 分区
1
| cfdisk /dev/nvme0n1 (根据具体情况更改需要分区的硬盘)
|
全新硬盘一般分3个区,100~500M左右的efi system分区、2g左右linux swap分区、及剩余容量的linux filesystem分区
- 格式化
1
2
3
| mkfs.fat /dev/nvme0n1p1
mkswap /dev/nvme0n1p2
mkfs.btrfs -L archlinux /dev/nvme0n1p3 (以上根据实际分区情况分别格式化)
|
- 创建btrfs子卷 (如linux filesystem不是btrfs文件系统的话不需要此步骤)
1
2
3
4
| mount -t btrfs -o compress=zstd /dev/nvme0n1p3 /mnt
btrfs subvolume create /mnt/@
btrfs subvolume create /mnt/@home
umount /mnt
|
- 挂载
1
2
3
4
5
6
| mount -t btrfs -o subvol=/@,compress=zstd /dev/nvme0n1p3 /mnt # 挂载 / 目录
mkdir /mnt/home # 创建 /home 目录
mount -t btrfs -o subvol=/@home,compress=zstd /dev/nvme0n1p3 /mnt/home # 挂载 /home 目录
mkdir -p /mnt/boot/efi # 创建 /boot/efi 目录
mount /dev/nvme0n1p1 /mnt/boot/efi # 挂载 /boot/efi 目录
swapon /dev/nvme0n1p2 # 挂载交换分区
|
3. 安装系统
1
| pacstrap /mnt base base-devel linux linux-firmware dhcpcd vim sudo grub efibootmgr openssh rsync curl
|
如果遇到pacman kerying问题,使用以下来解决:
1
2
| pacman-key --init
pacman-key --poplate
|
4. 生成 fstab 文件
1
| genfstab -U /mnt > /mnt/etc/fstab
|
5. Change root
6. 设置主机名与时区
- 设置主机名
archlinux (取一个自己钟意的主机名)
127.0.0.1 localhost
::1 localhost
127.0.1.1 archlinux.localdomain archlinux
- 设置时区
1
| ln -sf /usr/share/zoneinfo/Asia/Shanghai /etc/localtime
|
- 硬件时间设置
7. 设置 Locale
可以根据自己的需求选择en_US.UTF-8、zh_CN.UTF-8等
1
2
| locale-gen
echo 'LANG=en_US.UTF-8' > /etc/locale.conf
|
8. 设置root密码
9. 安装引导程序
- 安装grub到efi分区
1
| grub-install --target=x86_64-efi --efi-directory=/boot/efi --bootloader-id=archlinux
|
- 生成grub配置文件
1
| grub-mkconfig -o /boot/grub/grub.cfg
|
10. 完成安装
1
2
3
| exit # 退回安装环境
umount -R /mnt # 卸载新分区
reboot # 重启
|
11. 添加用户
1
2
| useradd -m -G wheel,video xxx
passwd xxx
|
使用 vim /etc/sudoers 修改使用 xxx 用户可以使用 sudo 命令
12. 添加archlinuxcn源
- 使用 vim /etc/pacman.conf 在最后添加 archlinucn 源
1
2
| [archlinuxcn]
Server = https://mirrors.tuna.tsinghua.edu.cn/archlinuxcn/$arch
|
- 更新源
- 安装archlinuxcn-keyring包导入GPG key
1
| pacman -S archlinuxcn-keyring
|
- 安装 yay
13. 安装显示驱动
- 根据自己不同的显卡安装相应的驱动,我的是 nVidia RTX A4000
1
| pacman -S nvidia (安装完毕后重新启动)
|
- 设置 DRM 内核模式
14. 安装plasma桌面与KDE应用程序
我使用的是较小化安装
1
| pacman -S plasma konsole dolphin kwrite kate ark kcalc gwenview plasma-nm plasma-pa networkmanager plasma-systemmonitor sddm
|
15. 安装字体
1
| pacman -S noto-fonts-cjk wqy-zenhei wqy-microhei dobe-source-han-sans-otc-fonts adobe-source-han-serif-otc-fonts adobe-source-code-pro-fonts ttf-dejavu
|
16. 安装并设置 fcitx5
- 安装 fcitx5
1
| pacman -S fcitx5-im fcitx5-chinese-addons fcitx5-rime (根据各自喜好添加安装不同输入法,我个人比较喜欢使用中州韵)
|
- 设置 fcitx5
- 随桌面启动
1
| cp /usr/share/applications/org.fcitx.Fcitx5.desktop ~/.config/autostart/
|
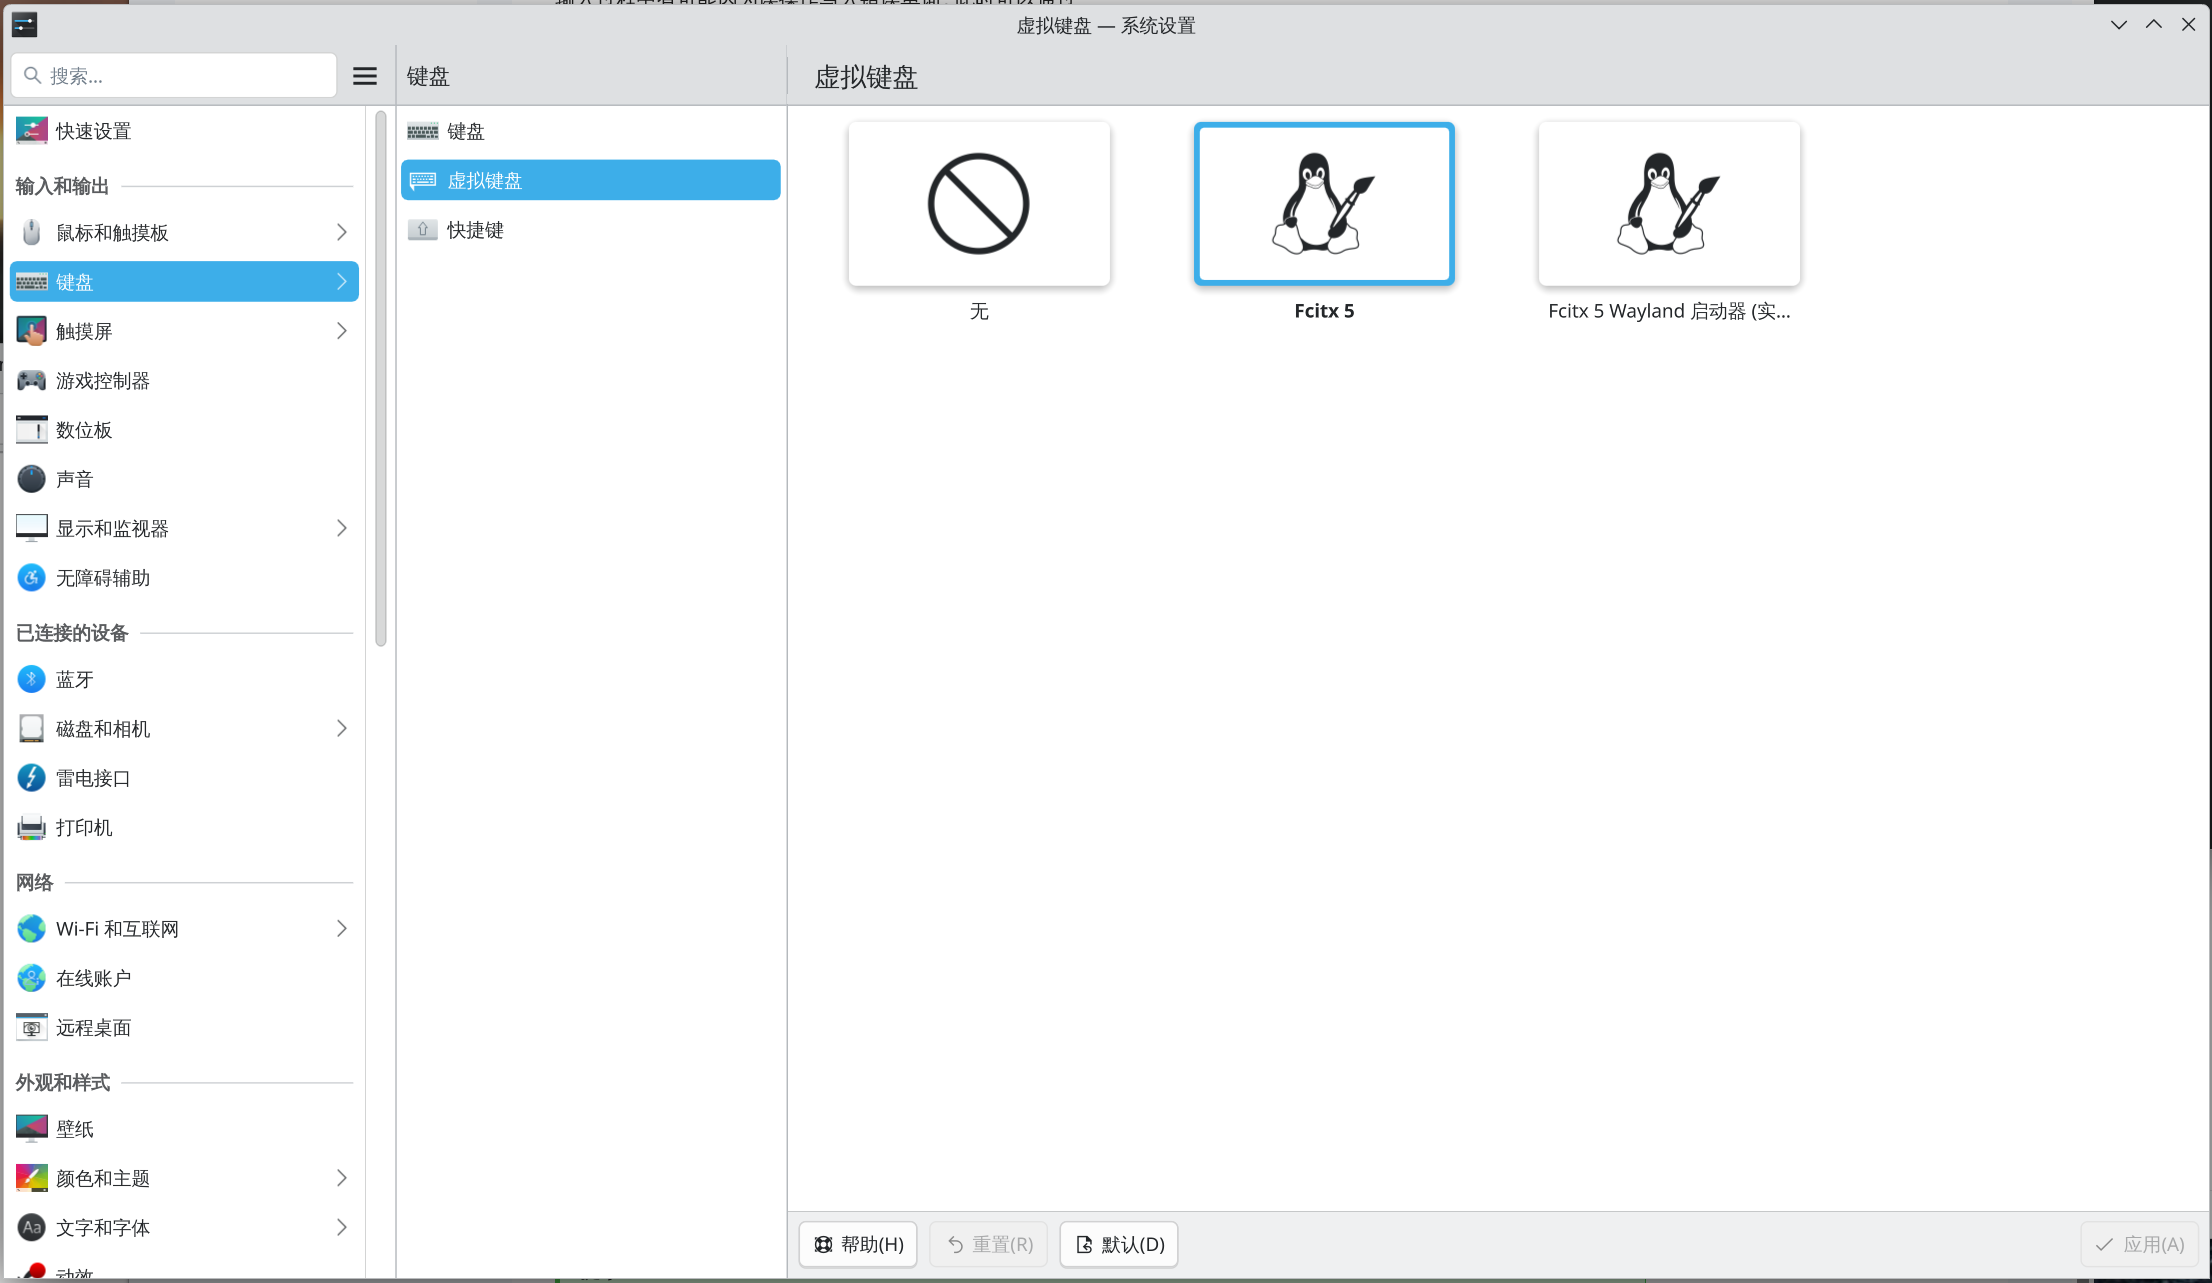
- 虚拟键盘设置为 Fcitx5 (如下图)

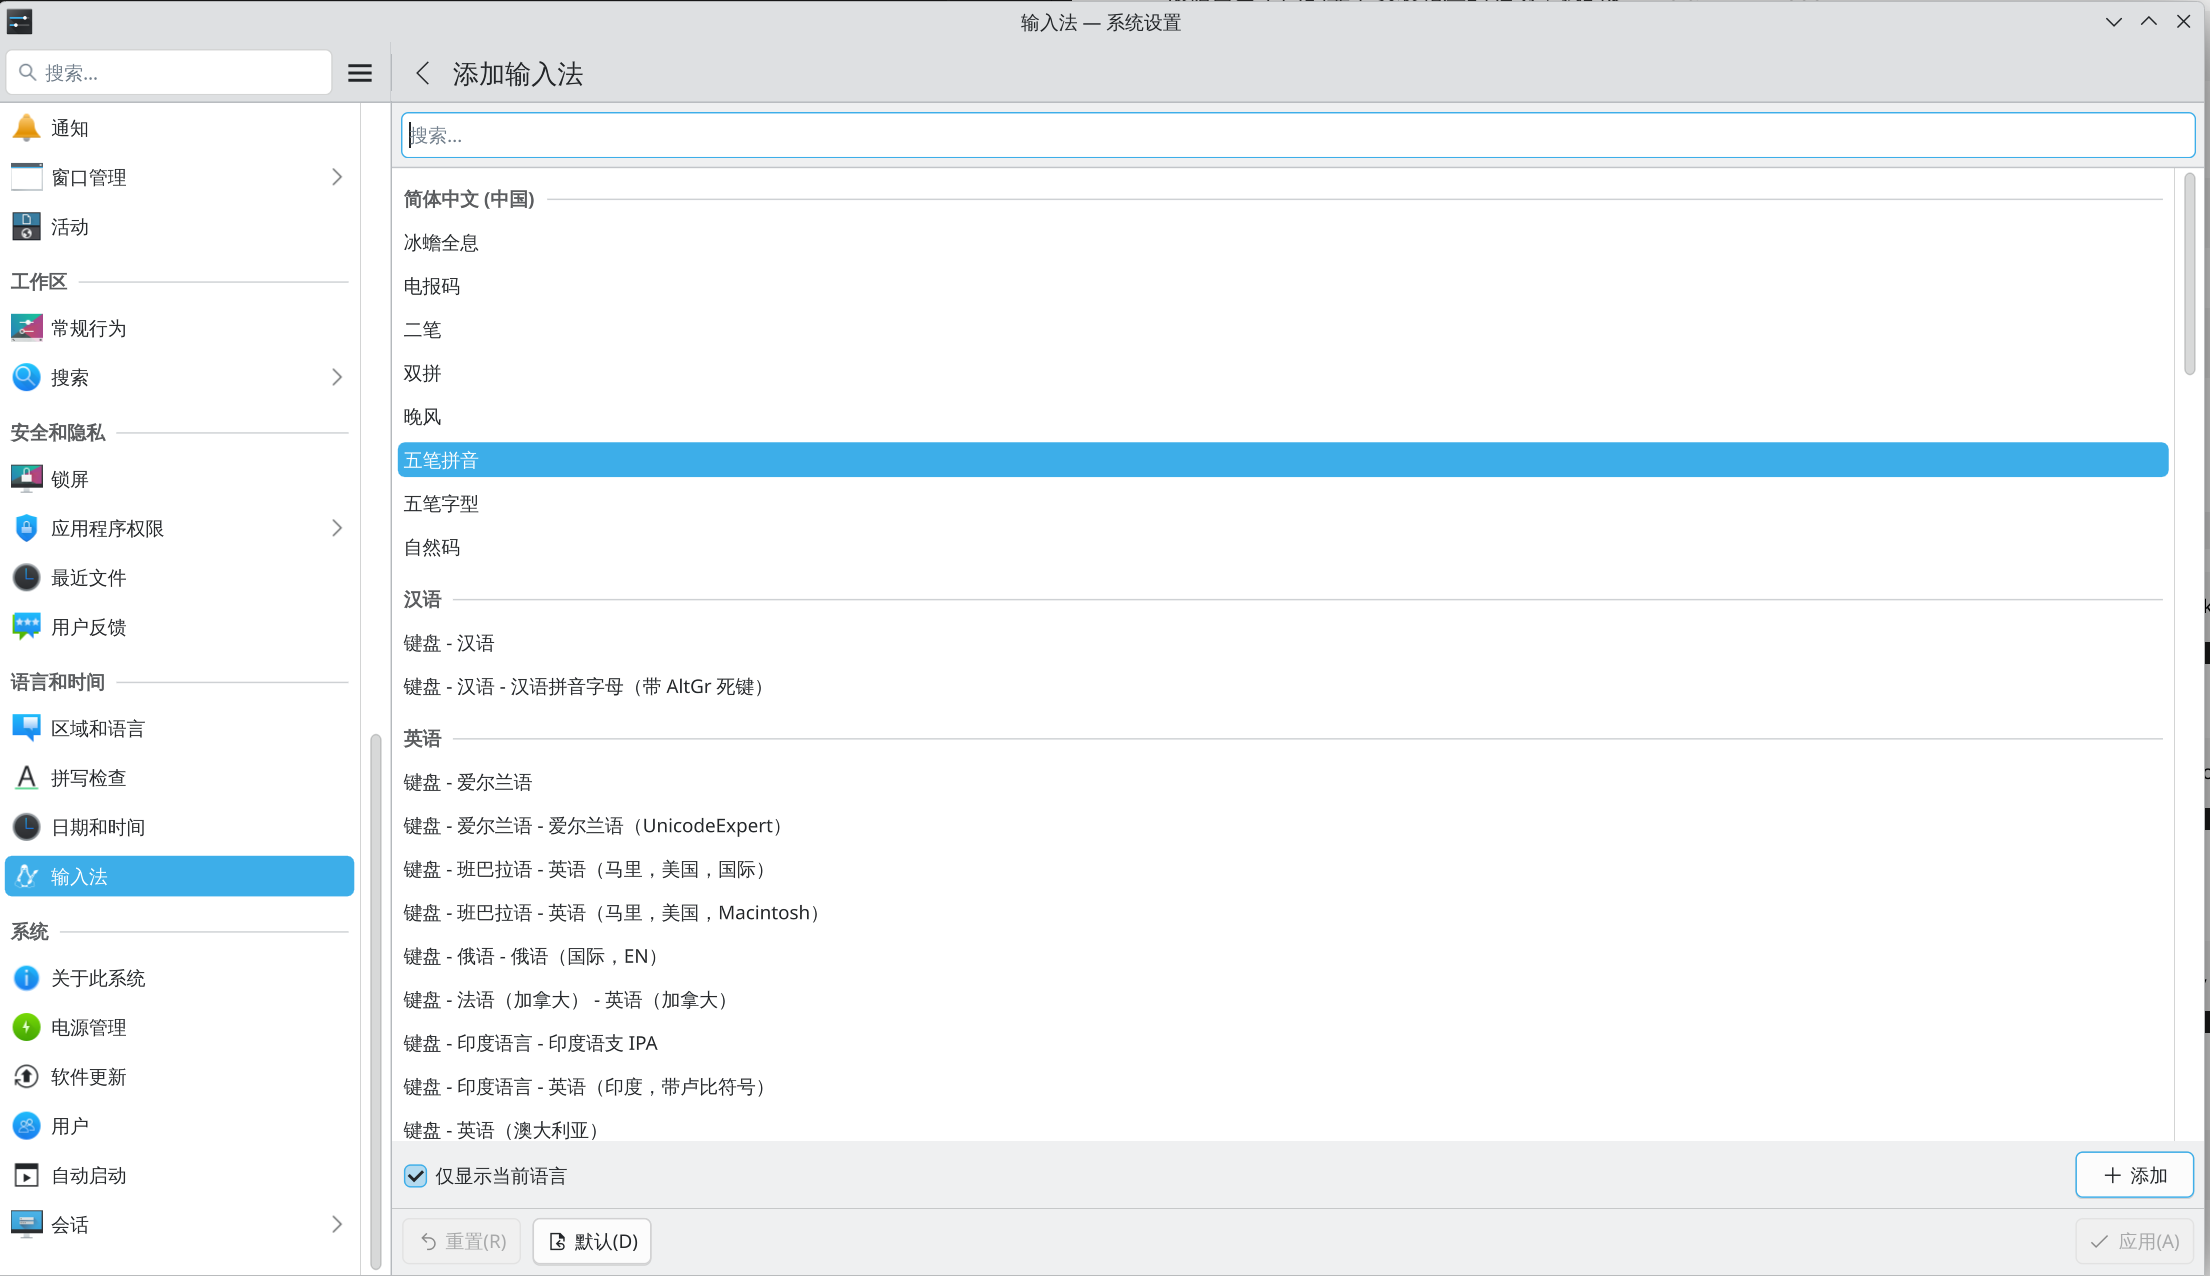
- 添加中州韵输入法 (如下图)
- 使用 vim ~/.config/code-flags.conf 添加以下配置来解决 visual-studio-code-bin 下无法使用 fcitx5 的问题
1
2
| --ozone-platform-hint=auto
--enable-wayland-ime
|
具体可以参考:https://wiki.archlinux.org/title/Fcitx5 与 https://wiki.archlinuxcn.org/wiki/Fcitx5
17. 系统调整
- 调整 sddm 登录时屏幕分辨率
- 使用 vim /etc/sddm.conf.d/hidpi.conf 来添加以下设置
1
2
3
4
5
| [Wayland]
EnableHiDPI=true
[X11]
EnableHiDPI=true
|
- 当使用基于 Qt 的问候程序(如 Breeze)时,请添加以下配置:
1
2
| [General]
GreeterEnvironment=QT_SCREEN_SCALE_FACTORS=2,QT_FONT_DPI=192
|
- 隐藏用户出现在登录界面 (由于我的git用户的uid为1003,默认为出现在登录界面)
18. 安装其它应用程序
- 安装 nginx php-fp mariadb
1
| pacman -S nginx php php-fpm php-gd mariadb
|
- 编译webdav所需要的模块
1
2
3
4
5
6
7
8
9
10
| wget http://nginx.org/download/nginx-1.29.1.tar.gz
git clone https://github.com/mid1221213/nginx-dav-ext-module.git
git clone https://github.com/openresty/headers-more-nginx-module.git
tar zxvf nginx-1.29.1.tar.gz
pacman -S libxslt
./configure --with-compat --with-http_dav_module --add-dynamic-module=../nginx-dav-ext-module/ --add-dynamic-module=../headers-more-nginx-module/
make modules
sudo sh -c "echo -n 'davuser:' >> /etc/nginx/auth/dav.pass"
sudo sh -c "openssl passwd -apr1 >> /etc/nginx/auth/dav.pass"
|
- 安装chrome, vscode, wps等
1
| yay -S google-chrome visual-studio-code-bin ttf-wps-fonts wps-office-mui-zh-cn wps-office-mime-cn wps-office-cn ttf-ms-fonts
|
- 启动 nginx php-fpm mariadb
- 安装 mariadb 默认数据库
1
| mariadb-install-db --user=mysql --datadir=/data/mysql
|
- 初使化设置 mariadb
1
| mariadb-secure-installation
|
- 修改 /etc/my.cnf 添加以下设置
1
2
3
4
5
6
7
| [mysqld]
datadir = /data/mysql
max_allowed_packet = 1024M
character-set-client-handshake = FALSE
character-set-server = utf8mb4
collation-server = utf8mb4_unicode_ci
|
- 启动 nginx php-fpm mariadb
1
2
3
4
5
6
7
8
| systemctl enable nginx
systemctl start nginx
systemctl enable php-fpm
systemctl start php-fpm
systemctl enable mariadb
systemctl start mariadb
|